
Buildings
Buildings
BackGeneral Info
Buildings are a key component to success in Tribal Wars 2 and also show the advancement of you as a player in the game. Each building has a point value, and the sum of all building points is displayed on your city in the map overview. Buildings can unlock features, units and research options in your village. The progression of your village strongly depends on your Headquarter's level, so keep this in mind when planning your building strategy.Building Requirements
Building requirements can comprise 5 things:
|
Building requirement dependencies
|
|---|
| Item | Icon | Location | How do I get more of this? |
|---|---|---|---|
| Wood (Resources) |  |
Top right interface | Increase the level of the building: Timber Camp |
| Clay (Resources) |  |
Top right interface | Increase the level of the building: Clay Pit |
| Iron (Resources) |  |
Top right interface | Increase the level of the building: Iron Mine |
| Provisions |  |
Top right interface | Increase the level of the building: Farm |
| Headquarters requirement | 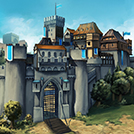 |
The middle of the village overview | Increase the level of the building: Headquarters |
Which building does what?
| Icon
|
Name
|
Description
|
|---|---|---|
|
The Headquarters
|
The Headquarters gives you an overview of your Kingdom and allows you to construct buildings and research technologies. It also allows you to instantly finish construction orders, if the timer allows it. |
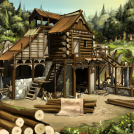 |
Timber Camp | The Timber Camp is a key component to your village's growth. The Timber Camp produces wood for your village, even when you are offline. Wood is used to construct buildings and training units. The higher the level of the Timber Camp, the more wood it produces per hour. |
 |
Clay Pit | The Clay Pit is a key component in your village's growth. The Clay Pit produces clay for your village, even when you are offline. Clay is used to construct buildings and training units. The higher the level of the Clay Pit, the more clay it produces per hour. |
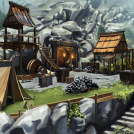 |
Iron Mine | The Iron Mine is a key component in your village's growth. The Iron Mine produces iron for your village, even when you are offline. Iron is used to construct buildings and training units. The higher the level of the Iron Mine, the more iron it produces per hour. |
 |
Farm | The purpose of the Farm is to create provisions that feed your village residents. The higher the level of the Farm is, the more provisions it yields, which in turn allows for a higher population.
Provisions are used for both buildings and units. It's therefore a good idea to make sure that you have built up your Farm according to your village's demands. You can see your available provisions in the bar at the top right corner of the screen. |
 |
Warehouse | The Warehouse stores a certain amount of resources. These resources can be used for buildings, units and technologies. The higher the level of the Warehouse, the more resources you may keep at one time.
Each Warehouse level allows you to store a certain amount of each resource. This can be found out by clicking on the Warehouse. You can hide resources by unlocking the technologies in the warehouse. Hidden resources cannot be plundered by attackers. |
 |
Chapel/Church | The Chapel gives all the villages in your starting province a strength bonus. When the villagers have faith, the troops fight at 100% effectiveness instead of 50%. The Chapel is built by default in your first village. You can only have one Chapel at any given time. When a village is nobled the chapel will disappear. If your village with the chapel is nobled, you can build a new chapel in any of your villages.
The Church gives all the villages in the province a strength bonus. When the villagers have faith, the troops fight at 100% effectiveness instead of 50%. It is advisable to only build new Churches in provinces where you don't have a Church or Chapel yet. When a village is nobled the church will disappear. |
 |
Rally Point | The Rally Point is where you can generate your army presets. These presets can be used in all villages, for both attacking or training troops.
You can read more about presets here. The Rally Point speeds up your raid attacks against Barbarian villages. Each building level will increase the speed by 50% up to a 250% attack speed against Barbarians on max level. |
 |
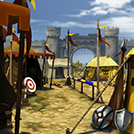
Barracks | In the Barracks you can train units to defend your village or to attack your enemies. You will see the units separated into two groups, defensive and offensive. This will help you when deciding which units you should recruit.
You can see the numbers of every unit in your village in the corresponding box. The numbers in parenthesis are the sum of the units currently in the village and the units in the recruitment queue. This helps you to achieve the correct number of units in each village. |
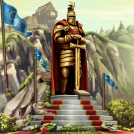 |
Statue | The Statue allows you to host your Paladin, a formidable warrior who will be an invaluable help on your way to dominance.
When the Paladin has been summoned, you can equip him with a variety of weapons that suit your particular battle style. |
 |
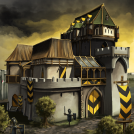
Wall | The wall protects your village against enemies units. The higher it's level, the better the basic defence of your village. It also increases the defensive strength of the troops stationed in the village. |
 |
Hospital | In the Hospital your wounded troops are healed and attended to. At first your Hospital will have 100 beds for your wounded combatants. After each level it will be expanded with more beds. After a healing period of 6 hours your units will be ready to fight again. But you have to release them manually! |
 |
Market | At the Market you can trade resources with others players. The higher the level, the more carts you will have to ship resources with.
You can either trade with NPCs by using crowns, create your own offers or accept offers from other players. |
 |
Tavern | In the Tavern you can hire spies to do some dirty work for you. Spies will help by gathering knowledge about your enemies, be it troop numbers or building levels. You should be careful though, your enemy can activate countermeasures to provide you with false information.
Each countermeasure can help you in different ways. You can learn more about what each technology (countermeasure) does, by reading through the section below. If you have chosen the 'Guild of Thieves' order from the Hall of Order, you are able to sabotage your enemy's villages. In order to do that, you need at least 3 spies to send. Please note that spies sent on a sabotage mission will always die regardless of the sabotage outcome (successful/unsuccessful). If you have upgraded the tavern to level 14 or researched the technology “homeguard” with crowns, you mobilize your citizens to protect your village against sabotages. Sabotage attacks will fail more often compared to a village without this research. For counter measures to work, you need at least one spy in your village. Countermeasures only have a slight chance of being activated when spied. |
 |
Academy | The Academy lets you build Noblemen, which you need to take over other villages. It is also where you have to mint coins in order to train your Noblemen. The cost of each Nobleman will increase as you train them. |
 |
Hall of Orders | The Hall of Orders lets you choose between three Orders, each of which has its own advantages.
The three Orders are:
Please note that spies sent on a sabotage mission will always die regardless of the sabotage outcome (successful/unsuccessful). Note: If you are dissatisfied with your order, you can easily reset it, and choose another order. It costs 200.000 resources of each resource. |
 Czech
Czech  Dutch
Dutch  French
  German
  Greek
Greek  Hungarian
  Italian
  Polish
  Portuguese
  Portuguese (Brazil)
  Romanian
  Russian
  Slovak
  Spanish
  Turkish