
Gameplay
Gameplay
BackInterface
Main Menu
In the main menu, you have access to the most important features.
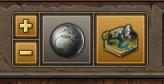
The first block contains the map controls. You can zoom in and out there, if you don't want to use your mouse scroll wheel. You can also access the world map and switch between the normal map and the village view.
In the second block you can open several windows:

| Number | Name | Description |
|---|---|---|
| 1 | Reports | Whenever something important happens in the game, you'll receive a report |
| 2 | Messages | Here you can find your conversations with other players |
| 3 | Tribe | Here you can access all the tribe functionality |
| 4 | Tribe Forum | A quick link to open the tribe forum |
| 5 | Units | An overview of all units in your village and their status and movement |
| 6 | Overviews | A list of all your villages with collected data of all kinds |
| 7 | Shop | Here you can buy some cool premium boosters |
| 8 | Inventory | You have access to all your items in the Inventory |
| 9 | Achievements | An overview of your achievements and their progress |
| 10 | Settings | If you want to play together with your friends you can find the coop mode here. In addition several settings to customize the game. |
| 11 | Toggle timeline | Toggle the timeline view of your current village |
When you join a tribe, the icon (shown above, numbered 3) will change and look like this:

If you are not already a member of a tribe, there will be a small number next to the tribe icon, if you have open invitations.
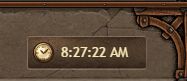
In the bottom right you can see the server time. The server and all its features runs by this time.
Timeline
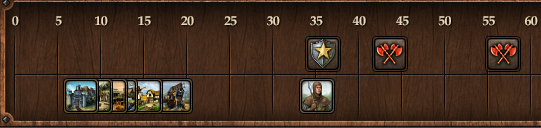
In the timeline you can see events that are going to happen in the currently active village, such as recruiting troops, training spies and nobles, building queue, incoming attacks, resource deposit errands, night bonus, etc.
The 0 on the far left side is the present time. The further events are located to the right, the longer it will take to occur. The scale of the time-line is not linear. First the scale is in minutes (up to the 60) after that in hours (up to the 24) and the final numbers represent days.
You can scroll the timeline by dragging it to the left and right with your mouse.
The upper row shows all unit-movement related events like incoming attacks and support, as well as your returning armies.
In the bottom row you can see when a building or a recruitment order will be completed.
Hint:
By clicking on an incoming attack icon you directly open the list with all inbound attacks for this village.
Ranking

You can access the ranking if you click on your current rank or the points in the upper left of your game screen.
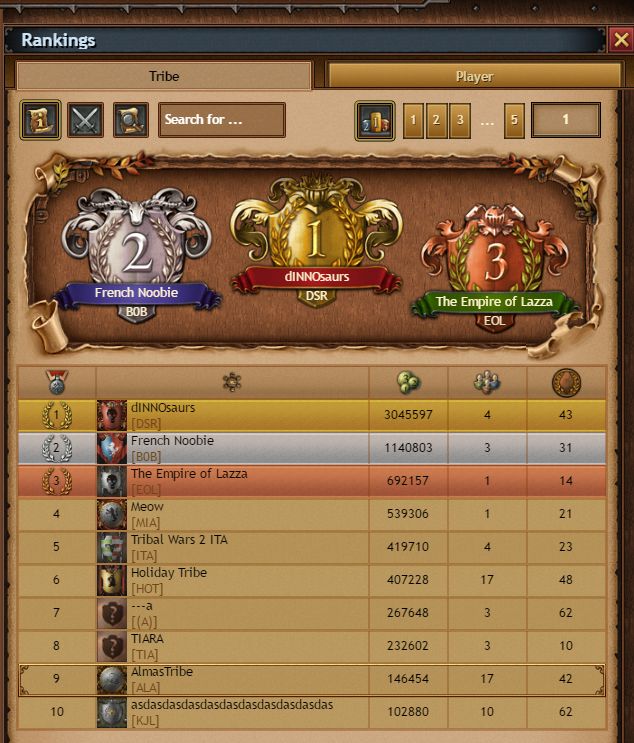
You can either view the tribe rankings or the players ranking by pressing the tabs on top. The icons below the tabs allows you to view general ranking, ranking by bashpoints or village/points based rankings.
All rankings can be sorted by their columns.
Player Profile

To see your profile, you can simply click on your name in the upper left of your game screen.
There you can edit your avatar picture, write a profile text and select the achievements you want to show to other players if they view your profile.
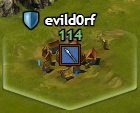
Village Info

Here you can see the currently active village with its coordinates on the map. If you have more than one village, there are arrow buttons to switch between your villages.
You can click on the name to open a window with more detailed information where you can also change the name of that village.
Groups

You can assign groups to villages for easier management. Groups are displayed on the map and very useful in the later game if you own multiple villages with a different strategic focus.
Hint:
Groups can also be assigned to enemy villages. You can use this for example to mark offensive and defensive villages after spying on them.
Your coop partners can see these groups as well, so it's a great tool to communicate potential attack plans or things like that.
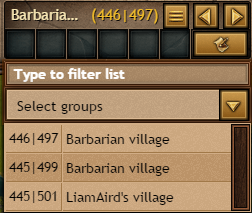
Village list 
To access the village list simply click on the icon next to your village name to expand your village list. Now you can easily navigate to your desired village. You can also apply filters to manage your village list more easily if you have dozens of villages!
Resources
Also see Resources and Provisions in Basics
Quests
Quests are located on the left side of the screen.
In Tribal Wars 2 you always have questlines shown here instead of single quests.
A questline is usually comprised of multiple quests, and you can decide in which order you want to finish them.
After completing all quests in a questline, you can finish the questline itself. (see left column)
For a complete list of all quest, go to: Quest overview.
Global Information
On the bottom of the screen you can find important notifications for different events. You can expand and collapse this notifications by clicking on them.

Types of events
There are two types of icons depending on whether the event is for your account or for the current active village. Events for the account have the globe as symbol while events for the current village have an icon with village and alarm bell, as shown above.
Active boosts
| Symbol | Boost | Effect |
|---|---|---|
 |
Wood Booster | +20% more wood production. Tool tip shows ending time |
 |
Clay Booster | +20% more clay production. Tool tip shows ending time |
 |
Iron Booster | +20% more iron production. Tool tip shows ending time |
 |
Prosperity | +20% more production of all resources. Tool tip shows ending time |
 |
Bountiful Harvest | +10% more population in the active village |
 |
Bountiful Season | +20% more population in the active village |
 |
Vault | Increases the capacity of your warehouses in all villages by 50%. Tool tip shows ending time |
 |
Domination | +10% faster recruitment in your barracks. Tool tip shows ending time |
Event Types
| Icon | Name | Description |
|---|---|---|
 |
Incoming attack | If you see this, one or more of your villages will be attacked soon. The number in the right down corner of the axes shows quantity of incoming attacks. |
 |
Incoming support | This is the same as the incoming attack event, but it shows you the inbound support operations instead. |
 |
Loyalty counter (visible if under 100) | This notification is only displayed if the loyalty of the currently selected village is below 100. |
 |
Attack Protection | During your first days on the server, the first days after a restart or when placing your second village this village is protected against attacks.
This protection is lost if you attack or spy someone else or when the timer runs out. The timer is shown when you hover over the icon. During attack protection, you can use the hotkeys to attack other villages. Have in mind that if you attack or spy another player during your attack protection, your protection will end immediately. |
 |
Night Bonus active | On some worlds, there is a night bonus active for a couple of hours each day. You will also see this notification if you turned off the night graphics in the settings. |
 |
Lack of Faith | This icon shows when you have a village that is not covered by a church. The combat strength in these villages are reduced with 50%. |
Building and Unit Queue
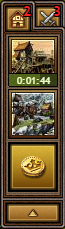

On the image to the left you see the building queue for the currently selected village. By clicking on an empty slot you can access the Headquarters. By clicking on a building icon in the queue you can open details about the build job where you can cancel the job or complete it by spending Crowns.
By using the unit queue, shown in the image to the right, you can give training orders in a second. Just click on the '+' icon, and choose the unit type. In this queue, you can have more than 2 trainings. You can also see your orders from the barracks.
Queue indicators will now tell you how long it will take to finish the queue.
- Red: The queue will be finished within the next 4 hours.
- Orange: The queue will be finished between the next 4 to 8 hours.
- Green: The queue will be finished in more than 8 hours.
Unit bar

The unit bar gives you a quick overview of all units that you have trained in the selected village. Clicking an icon will open the related building where you can recruit the unit.
Important note: Units from other villages that are supporting your village are NOT included.
Sometimes units are greyed out. This shows that the unit cannot be trained in this village yet.
Village Overview
If you are currently looking at the map overview, you will find a button on the bottom left to go to your village overview. In this overview you will see a list of all your great buildings. If you click on a building you will get the context menu with the following options:
Village context menu
| Icon | Description |
|---|---|
 |
Opens the related building window. |
 |
Shows general information about the building. For example, what bonus you will get on the current building level, and the costs for the next level. |
 |
Upgrades the building. If the arrow is greyed out, either resources are missing or the building queue is full. |
 |
Upgrades the building with reduced resource costs for a small amount of Crowns. |
 |
Finishes the upgrade progress instantly. You have to spend Crowns for this action. The longer the remaining time, the more Crowns you have to invest. |
Map View
If you click on a village on the map you will see a context menu. Depending on the village you clicked on and your currently selected village you will get the available options.
Map context menu
| Icon | Description | Availability |
|---|---|---|
 |
This button opens the village info window where you get detailed information about the village, the player, travel times for units etc. | Available for all villages |
 |
This button allows you to send a custom amount of units to another village. For attack or support purposes. | Available for all villages, except the currently selected one |
 |
This buttons allows you to send an army preset to another village. For attack or support purposes. | Available for all villages, except the currently selected one, if you have at least one preset there. |
 |
To find out what buildings or units are inside another village, use this button. | Available after you have built the tavern. |
 |
This button allows you to send resources to another village. | Available for your own villages after you have built the market. For other villages you have to research "Delivery" in the market. |
 |
Send a message to the owner of that village | Available for player villages. If you’re not allowed to send message to another player (for example you don’t have the necessary points), you’ll be prompted with the appropriate popup window which will inform you about the reason. |
 |
Changes the currently active village | Available if you own more than one village. |
 |
Add groups | Available for all village. Used to organize your villages into groups. |
 |
Boost production | Available for barbarian villages. Allows you to increase the production of the barbarian village. |
Chat

To open the chat function, click on Post horn icon on the left on the bottom.
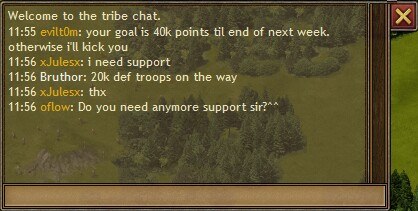 |
The Chat function is very useful, if you are an active member of your tribe. You can easily chat with each other, and make attacks, and supports faster, and it gives you a clearer overview.
Note: You have to be a tribe member to use this feature. |
Hotkeys
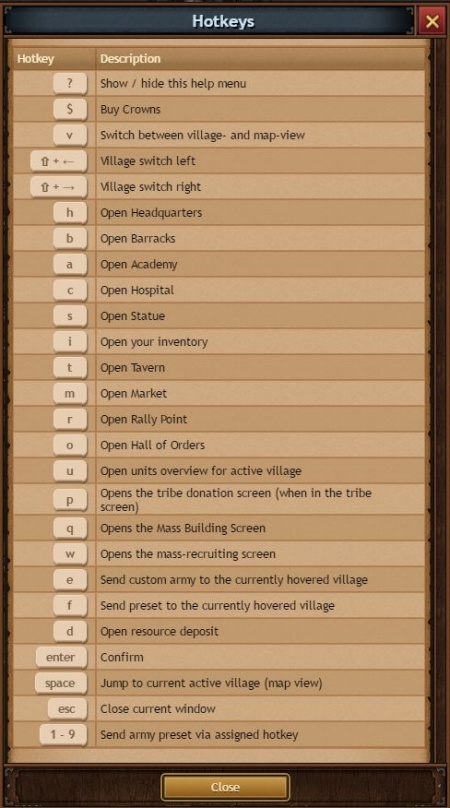 |
You are able to make actions quickly. Use the hotkeys to switch between your villages, open buildings, or confirm an action. |
You can create your own hotkeys for sending commands with presets. For this you only have to enter a hotkey at the bottom of the window where you enter the units to send:
To use your assigned hotkeys you click a village on the map to trigger the radial menu and simply press your desired hotkey to send your preset army.
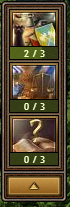
Resource Deposit
At the Resource Deposit, you can run errands to produce resources and earn extra bonus rewards for producing a total of 250, 750, 1,500, 3,000, 6,000 and 10,000 Resources.
The Resource Deposit is located near your village and after restarting on a world, it will be placed near your new village.
The six errands you can run are shown under the progress bar in boxes. Stars indicate the rarity of the given errand. The rarity is divided into 3 categories indicated by stars, the more stars, the more resources you will get, but higher quality errands occur less often.
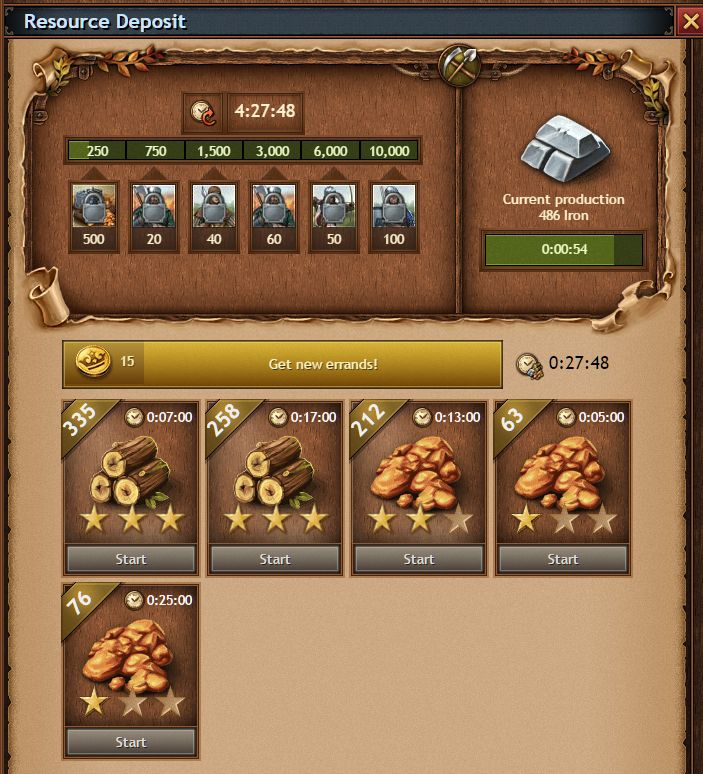
When an errand finished, an animated icon will be displayed above the Resource Deposit indicating that you will be able to collect the produced resources.
The list of errands will reset every eight hours while the progress towards collecting total amounts of resources needed to earn the bonus rewards will be reset all 24 hours.
You will also be able to refresh the errands list with new errands by using Crowns or Reroll items. Note that the progress towards collecting total amounts of resources needed to earn the bonus rewards will not be reset when you refresh the errands list.
Extra note: Uncollected resources will count towards the total progress of the next series of errands after the list has been reset.

Second Village
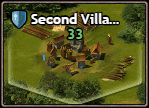
As every powerful ruler, you enter a realm with only a small settlement and a fistful of resources. While upgrading your first village is an essential part of your reign, it certainly is not the most memorable moment of your domination! It's time to expand your dominion right from the beginning. Send your pioneers to find fertile ground and establish a second village right away!Every new account that is created and every account that is restarted on a realm gets this icon on the map:
Click or tab this icon to enter the Second Village screen. You will find tasks which can be executed to earn points for your second village progression and additional rewards on top!
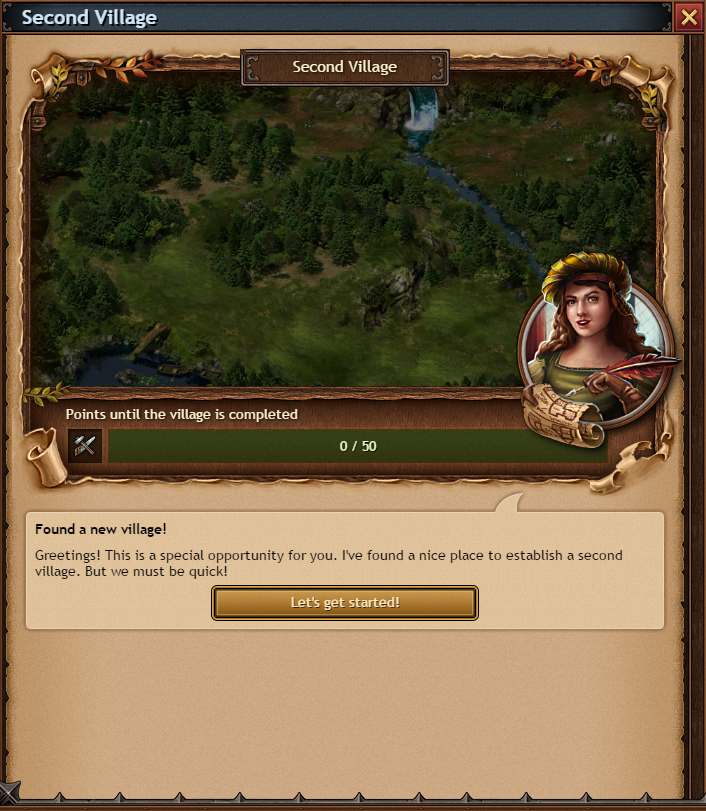
Do as many tasks as you can to finish your new village as quickly as possible. The amount of tasks is capped to a maximum of 10 per day, so check back every day to work on your new settlement. If you haven´t fulfilled all tasks for one day: Don´t mind, you will get the missing points for this day with the first task of the nest day.
You will need at least five days to finish your second village. When it is finished, it will be placed on the map near on you starting village and it becomes a small new village:
Your new village will have 59 points and an attack protection of its own for five days. So you can start building it up without the risk of being attacked at once. Additionally you get 2 coins to help you to get your first nobleman.
If you don´t finish it during 14 days the village will turn into a barbarian village and you loose this chance.
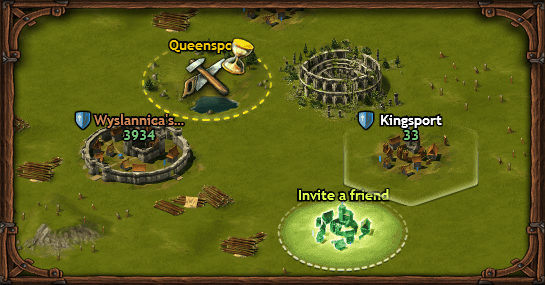
Invite a Friend
The Invite a Friend feature allows you to send your friends invites via email. Simply click on the 'Invite a friend' icon on the map. This feature in only available from browser.
A new window will let you enter your friend's name and email address and your own name, so your friend knows who sent the invitation to play the game.
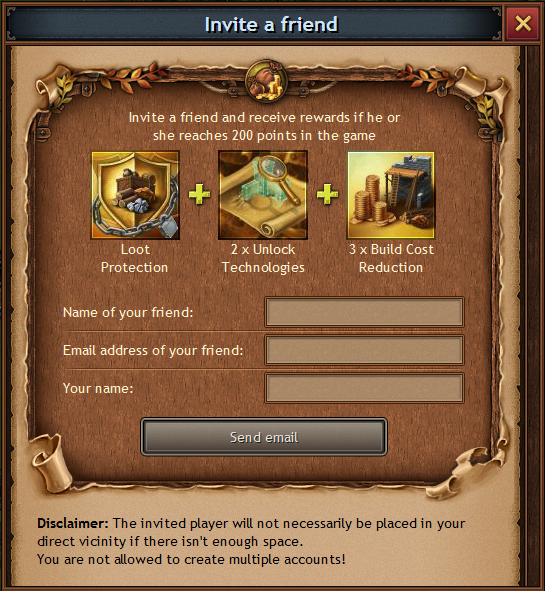
Once your friend has accepted the invitation, he or she will get a village as close to you as possible. As soon as an invitee has reached 200 points you will also get a reward package!
Note:
Keep in mind that the option to invite a friend is available only 14 days after you joined a world. After that time, the 'Invite a friend' icon will be disaapeared from the map and it won't be possible to reappear.
Daily Login Bonus
You can get a daily login bonus once a day. For every consecutive day you're logged in you'll receive 500 resources while on the 5th day you will receive 2.000 per resource.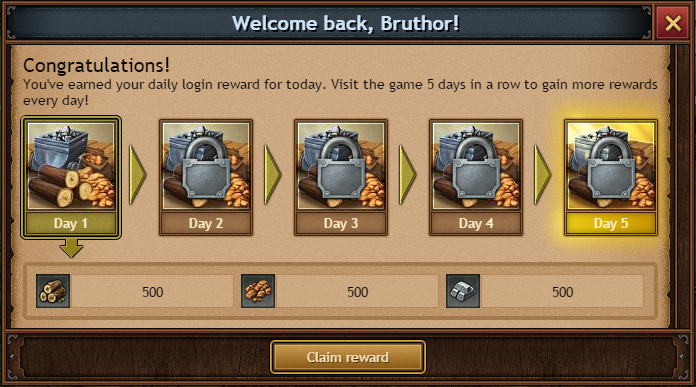
Language selection  (only on beta server and ΕΝ)
Our beta and EN server offers a language selection option. This mean that you can play on beta and the whole interface will be in your preferable language!
On the left side of the logout button, there’s an icon of a blue globe. By pressing it, you can see the current selected language. Pressing the arrow, it appears a drop-down menu from where you can choose your desired language. Pick up your preferable language and instantly the language turns to the chosen.
Moreover, the initial language setting will be set according to browser language. You can switch to any language whenever you want, without any restrictions.
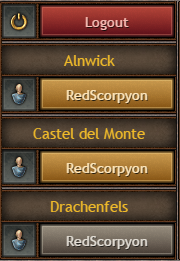
Logout 
If you are playing on more than one game world, you can now switch to another world without having to relog. Simply click on the logout button at the top right of your screen and select another world.
If you have signed up to be a coop partner with someone from your tribe, you will be able to login to his or her account from this menu too.
 Czech
Czech  Dutch
Dutch  French
  German
  Greek
Greek  Hungarian
  Italian
  Polish
  Portuguese
  Portuguese (Brazil)
  Romanian
  Russian
  Slovak
  Spanish
  Turkish